Focusrite Failed to Play Test Tone: A Comprehensive Guide
Are you encountering the “Focusrite failed to play test tone” error on your audio interface? This issue can be frustrating, especially when you’re in the middle of a recording session. In this detailed guide, I’ll walk you through the possible causes and solutions to help you resolve this problem. Whether you’re a beginner or an experienced user, this article will provide you with the necessary information to get your Focusrite interface up and running smoothly.
Understanding the Error

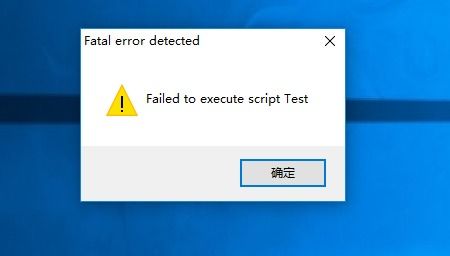
The “Focusrite failed to play test tone” error typically occurs when the audio interface is unable to generate a test tone. This can be due to various reasons, such as incorrect settings, hardware issues, or compatibility problems. Before diving into the troubleshooting steps, it’s essential to understand the potential causes of this error.
| Causes of “Focusrite Failed to Play Test Tone” Error |
|---|
| Incorrect audio interface settings |
| Hardware issues with the audio interface |
| Outdated or incompatible drivers |
| Interference from other devices or software |
| Power supply problems |
Checking Audio Interface Settings

One of the most common reasons for the “Focusrite failed to play test tone” error is incorrect audio interface settings. Here’s how you can check and adjust the settings to resolve the issue:
- Connect your Focusrite audio interface to your computer and power it on.
- Open your computer’s sound settings by clicking on the speaker icon in the system tray and selecting “Sound settings” or “Sound” from the context menu.
- In the Sound settings window, go to the “Playback” tab and select your Focusrite interface as the default device.
- Click on the “Properties” button next to your Focusrite interface.
- In the Properties window, go to the “Advanced” tab and ensure that the “Default format” is set to a suitable sample rate and bit depth (e.g., 44100 Hz, 24-bit).
- Click “OK” to save the changes and close the Properties window.
- Repeat the process for the “Recording” tab, ensuring that your Focusrite interface is set as the default recording device.
Updating Drivers and Software

Outdated or incompatible drivers can also cause the “Focusrite failed to play test tone” error. To resolve this, follow these steps:
- Visit the Focusrite website and download the latest drivers for your audio interface.
- Uninstall the current drivers from your computer by going to “Control Panel” > “Programs” > “Programs and Features.” Select your Focusrite interface from the list and click “Uninstall.” Follow the on-screen instructions to complete the process.
- Install the downloaded drivers by running the installer file and following the on-screen instructions.
- Restart your computer to ensure that the new drivers are installed correctly.
Checking for Interference
Interference from other devices or software can also cause the “Focusrite failed to play test tone” error. Here are some steps you can take to minimize interference:
- Ensure that your audio interface is connected to a stable power source. If you’re using a USB connection, try using a different USB port or a USB hub with a dedicated power supply.
- Disable any unnecessary background applications or processes that may be using the audio interface.
- Check for interference from other devices, such as Wi-Fi routers or Bluetooth devices. Try moving these devices away from your computer and audio interface.
- Update your computer’s operating system and antivirus software to ensure that they are not causing any conflicts.
Hardware Issues
In some cases, the “Focusrite failed to play test tone” error may be caused by hardware issues with the audio interface itself. Here are some steps you can take to troubleshoot hardware problems:
- Check the physical connections between your audio interface and computer. Ensure that all cables are


